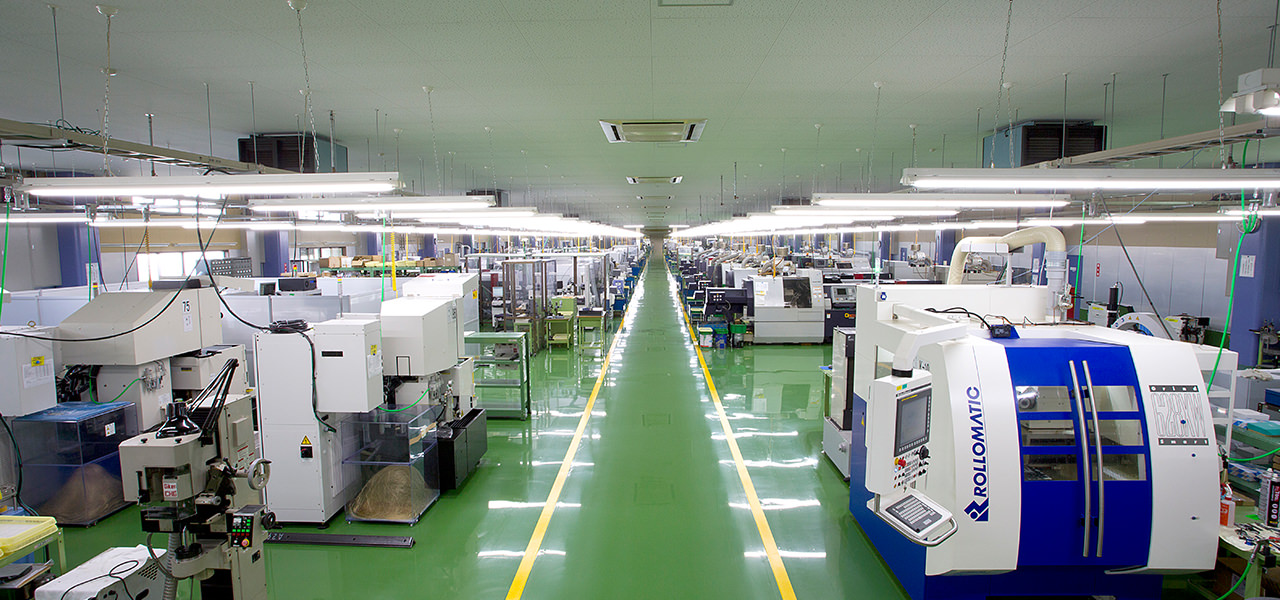
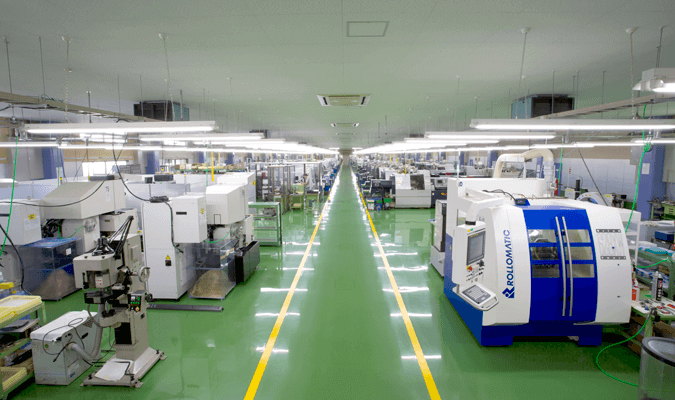
Processing Equipment



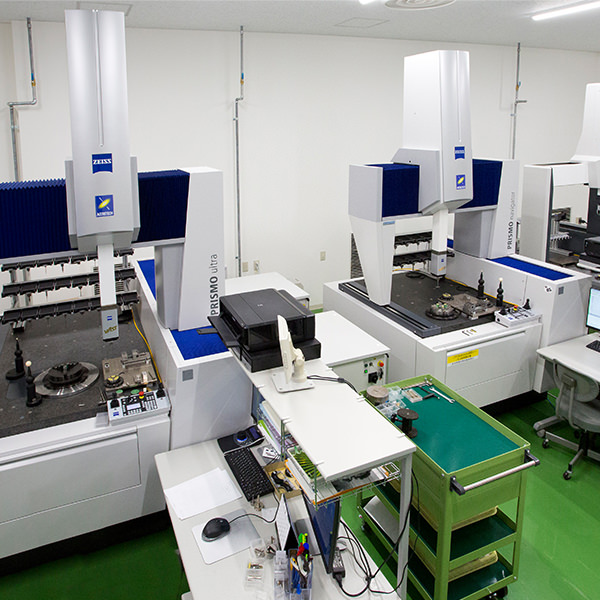
Inspection Equipment
Precise Temperature Chamber
5 Zeiss CNC3 three-dimensional coordinate measuring machines.
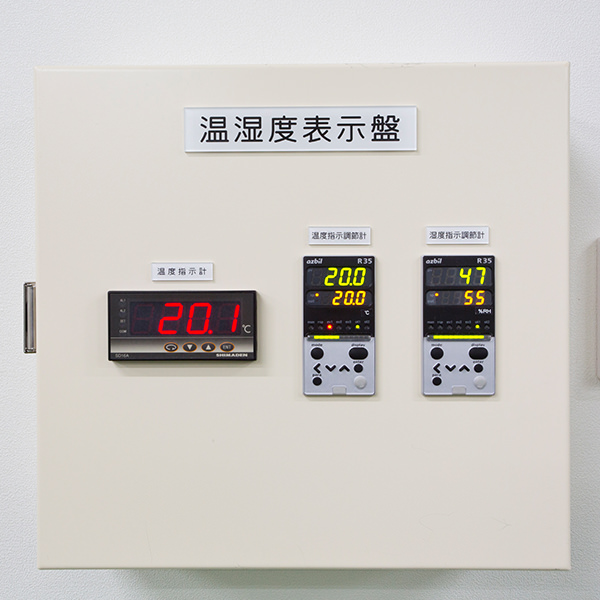
Kept at a temperature of 20 ± 0.5°
humidity of 50 ± 5%
(Evidence of this measuring environment is available)
Precision measurement room
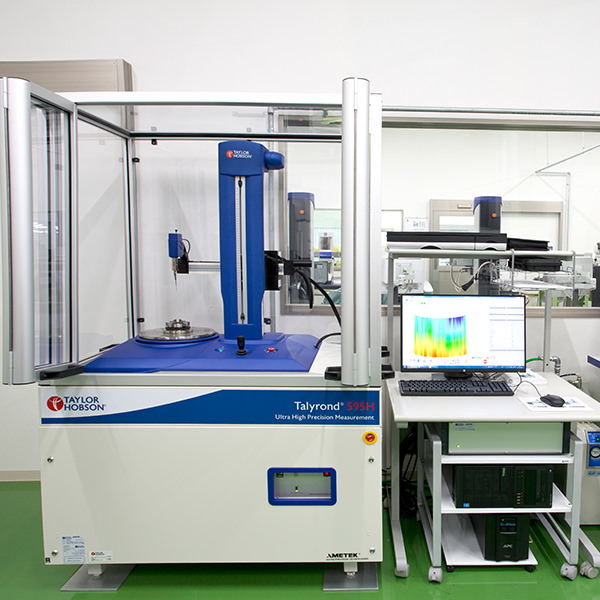
Taylor Hobson CNC roundness measuring machine

Taylor Hobson non-contact three-dimensional surface texture measuring machine
5 contour shape measuring machines and surface roughness contour shape measuring machines
5 circular/cylindrical shape measuring machines
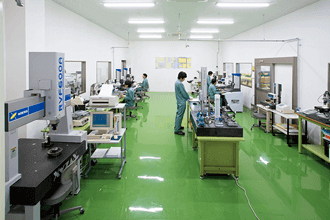
Precision Measurement Room
■ Main machinery and equipment
| CNC compound lathe (TTL 100 Units) |
Units | Type | Manufacturer |
| Compound automatic lathe | 6 | TMA8C-Ⅲ (φ150 or less. 60 ATC tools) |
Tsugami |
| Compound automatic lathe | 14 | M50SY-Ⅲ etc. (φ60 or less. 50,000 rpm) |
Tsugami |
| Compound automatic lathe | 7 | E32-Ⅵ (φ32 or less. 2 Spindle. 2 Turret.) |
CITIZEN MACHINERY |
| Compound automatic lathe | 9 | M32-Ⅴ (φ32 or less. 2 Spindle. 1 Turret. 3 Blade table.) |
CITIZEN MACHINERY |
| Compound automatic lathe | 17 | M16-Ⅴ (φ16 or less. 2 Spindle. 1 Turret. 3 Blade table.) |
CITIZEN MACHINERY |
| Compound automatic lathe | 8 | L20 (φ20 or less. 2 Spindle. 3 Blade table.) |
CITIZEN MACHINERY |
| Compound automatic lathe | 7 | SPEC: φ4 or less. 2 Spindle. 4 axes simultaneous. 17 tools max. 60,000 rpm. |
|
| Compound automatic lathe | 2 | SPEC: φ20 or less. 2 Spindle. 4 axes simultaneous. 37 tools max. 50,000 rpm. |
|
| Compound automatic lathe | 1 | SPEC: φ20 or less. 2 Spindle. 4 axes simultaneous. 58 tools max. 40,000 rpm. |
|
| Compound automatic lathe | 16 | SPEC: φ32 or less. 2 Spindle. 4 axes simultaneous. 56 tools max. 50,000 rpm. |
|
| Compound automatic lathe | 2 | SPEC: φ160 or less. 2 Spindle. 4 axes simultaneous. 54 tools max. 6,000 rpm. |
|
| Compound automatic lathe (5-axis control) |
1 | SPEC: φ20 or less. 2 Spindle. 5 axes simultaneous. 37 tools max. 120,000 rpm. |
|
| Compound automatic lathe (5-axis control) |
7 | SPEC: φ160 or less. 2 Spindle. 5 axes simultaneous. 60 ATC tools. 20,000 rpm. |
|
| Compound automatic lathe (5-axis control) |
4 | SPEC: φ600 or less. 2 Spindle. 5 axes simultaneous. 60 ATC tools. 20,000 rpm. |
|
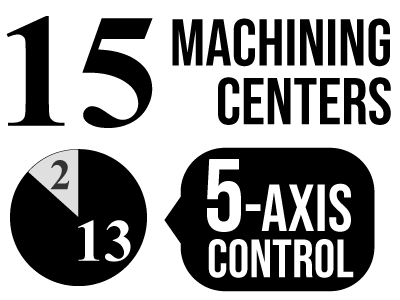
| Machining center (TTL: 15 units) |
Units | Type | Manufacturer |
| Machining center (5-axis control) |
2 | SPEC: Max.φ500×325. 40 tools. Spindle speed 25,000min. |
|
| Machining center (5-axis control) |
1 | SPEC: Max.φ160. 30 tools. Spindle speed 40,000min. |
|
| Machining center (5-axis control) |
1 | SPEC: Max.φ500×450. 60 tools. Spindle speed 14,000min. |
|
| Machining center (5-axis control) |
2 | SPEC: φ350×H315. 32 APC. Lathe turning function. 320 tools. Spindle speed 20,000min. |
|
| Machining center (5-axis control) |
2 | SPEC: φ350×H315. 32 APC. 330 tools. Spindle speed 20,000min. |
|
| Machining center (5-axis control) |
3 | SPEC: φ450×400. 19APC. 254 tools. Spindle speed 20,000min. |
|
| Machining center (5-axis control) |
1 | SPEC: Table 600×700. Lathe turning Function. 120 tools. Spindle speed 18,000min. |
|
| Machining center (5-axis control) |
5 | SPEC: Table 420×300. 60 APC. 90 tools. Spindle speed 40,000min. |
|
| Machining center (5-axis control) |
1 | SPEC: Table 600×500. 10 APC. 120 tools. Spindle speed 20,000min. |
|
| Machining center (5-axis control) |
1 | SPEC: Table 900×500. 8 APC. 60 tools. Spindle speed 24,000min. |
|
| Machining center (5-axis control) |
2 | SPEC: Max.φ500×H400. 6 APC. 64 tools. Spindle speed 15,000min. |
|
| Machining center (5-axis control) |
3 | SPEC: Table 700×Y400×H400. 21 tools. Spindle speed 24,000min. |
|
| Machining center (5-axis control) |
1 | SPEC: Max.φ50×400. Lathe turning function. 90 tools. Spindle speed 30,000min. |
|
| High-speed Machining center | 1 | SPEC: Table 600×330. 30 tools. Spindle speed 50,000min. |
|
| Vertical Machining center | 1 | SPEC:Table 700×420. 25 tools. Spindle speed 24,000min. |
|
| Grinder (TTL: 10units) | Units | Type | Manufacturer |
| CNC forming grinder | 1 | SPEC: Table 600×180 Cylindrical grinding machine / with NC plotter |
|
| CNC 6-axis tool grinder | 1 | SPEC: Process range: φ0.1~20mm. Automatic grinding wheel change. 6 sets at maximum(24pcs) |
|
| CNC cylindrical grinding machine | 2 | GE4A-50Ⅱ | JTEKT etc. |
| CNC universal cylindrical grinder | 1 | SPEC: 400mm between centers. Screw grinding, internal grinding, B-axis turning taper, eccentric machining, *They can be used together. |
|
| CNC cylindrical grinding machine | 1 | SPEC: 180mm swing. Distance between centers: 250m. Shaft and end face simultaneous machining. Matching grinding |
|
| CNC internal grinding machine | 1 | SPEC: Process range: from φ1.5 to φ170 or less. High-frequency type 1,500~150,000 rpm. |
|
| CNC 4-axis internal grinding machine | 1 | SPEC: Process range from φ1.0 to φ150 or less. 4-axis. High-frequency type 4,000~150,000 rpm. |
|
| CNC forming surface grinder | 1 | SPEC: Table work area: 500mm×150mm |
|
| Center hole grinding machine | 1 | CHG600P | Okamoto Machine Tool Works |
| Wire cut electric discharge machine (TTL: 4 units) |
Units | Type | Manufacturer |
| Wire cut electric discharge machine | 3 | ROBOCUT α-0ib/α-1iE | FANUC CORPORATION |
| Wire cut electric discharge machine | 1 | SPEC: Machining stroke: 400×300×250. 4-axis linear motor. |
|
| Ultra-precision Die-sinker EDM | 1 | SPEC: Spindle rotation angle indexing device ATC-24 pcs |
|
■ Main measuring equipment
| Units | Type | Manufacturer | |
| CNC 3D coordinate measuring machine |
1 | PRISMO ULTRA 9/13/7 | Carl Zeiss |
| CNC 3D coordinate measuring machine |
1 | PRISMO Verity 9/15/7 | Carl Zeiss |
| CNC 3D coordinate measuring machine |
1 | PRISMO Navigator7 9/12/7 | Carl Zeiss |
| CNC 3D coordinate measuring machine |
1 | PRISMO Navigator5 7/9/5 | Carl Zeiss |
| CNC 3D coordinate measuring machine |
1 | CONTURA RDS 7/10/6 | Carl Zeiss |
| CNC 3D coordinate measuring machine |
1 | DURAMAX HTG | Carl Zeiss |
| Multi-sensor type 3D coordinate measuring machine |
1 | O-INSPECT 543 | Carl Zeiss |
| Optical 3D non-contact measuring machine |
1 | SMART SCOPE VANTAGE 250 | OGP(QVI) |
| CMM | 3 | XYZAX SVF NEX 6 / 5 / 3 / -X2 etc. | TOKYO SEIMITSU etc. |
| CNC Roundness measuring machine | 1 | Talyrond 595H | TAYLOR HOBSON |
| CNC Roundness and cylindrical shape measuring machine | 5 | RONDCOM CREST etc. | TOKYO SEIMITSU |
| Surface roughness/contour shape integrated measuring machine | 2 | SURFCOM CREST-DX-T etc. | TOKYO SEIMITSU |
| Contour shape measuring machine | 4 | SURFCOM NEX 040DX-25 etc. | TOKYO SEIMITSU |
| Non-contact 3D surface measuring machine | 1 | Talysurf CCI MP-HS(XL) | TAYLOR HOBSON |
| Surface roughness measuring machine | 5 | SURFCOM TOUCH 550-14 etc. | TOKYO SEIMITSU |
| CNC Video Measuring System | 1 | NEXIV VMZ-R3020 | Nikon |
| Image processing measurement microscope | 3 | E-MAX / V set (MM-40 / L3T) | Nikon |
| Image dimension measuring instrument | 3 | LM-1000/1100/IM-7030T/IM-6500 | KEYENCE |
| Inline projection image measuring instrument | 2 | TM-X5040/TM-X5000 | KEYENCE |
| Digital microscope | 1 | VHX-2000 (Up to 5000 times magnification) |
KEYENCE |
| Industrial endoscope (ultrafine diameter spec) |
1 | FSC2 | Nikon |
| Air micrometer | 1 | Admec NmⅡ×10000 times | DAIICHISOKUHAN |
| Measuring microscope (with data processor) | 16 | MF-A4020D/MM-800 etc. | Mitsutoyo / Nikon |
| Microscope for horizontal swivel tools | 1 | PG1000-400(12.5 – 145 times) | EUROTECH |
| Linear height gauge | 4 | QMH-600 etc. | Mitsutoyo |
| Stereo microscope | 40 | SMZ1270i (Up to 80 times magnification) etc. |
Nikon / Olympus / Mitsutoyo / CARTON OPTICAL INDUSTRIES |
| Precision inner diameter measuring instrument | 10 sets | φ40 or less | DIATEST |
| Standard thread gauge (plug/ring) | 1 set each |
M30 or less(GP/WP) | OSG/OJIYA SEIKI |
| Pin Gauge, Gauge block (measuring standard) | 1 set | φ20 or less (0.01 step) / Steel・Ceramic-made (1mm step) |
Niigata Seiki/Mitsutoyo |
| Vickers hardness testing machine | 2 | HM-220B etc. | Mitsutoyo/Imai Seiki |
■ Others
| Laser / Carved seal | Units | Type | Manufacturer |
| Laser combined processing machine | 3 | LAMICS AQL1900/StarCutTube Fiber etc. | SHIBUYA CORPORATION/COHERENT(rofin) |
| YVO4 Laser marker | 2 | MDV9600-A /MD-X1500 | KEYENCE |
| PC engraving and marking machine | 2 | IS400 etc. | Gravograph |
| Cleaning/drying equipment | Units | Type | Manufacturer |
| Vacuum cleaning and drying equipment | 2 | UC-700AD | SHARP |
| 3-tank ultrasonic cleaning and drying equipment | 1 | UC-600AH Special / UC-600CH Special | SHARP |
| 3-tank ultrasonic cleaning and drying equipment | 1 | 2HUC-001 | A・S・K |
| CAD/CAM | Units | Type | Manufacturer |
| 2D CAD | 5 | Auto CAD/CB-CAD V3.5 | AUTODESK/FUJITSU |
| 3D CAD | 8 | Solid Works | Solid Works Japan |
| 3D CAD/CAM | 15 | NX / MastercamX etc. | SIEMENS/JBM etc. |
| Others | Units | Type | Manufacturer |
| Precision lapping and polishing machine | 2 | SPEC: Maximum machining diameter φ110. Thickness 0.1(thinnest). Flatness 0.001. Surface roughness Ra0.05. |
|
| Diamond & CBN grinding wheel forming machine |
1 | SPEC: Maximum grinding wheel diameter 350mm. Minimum molding R0.04mm. CCD camera Magnification 9-110x |
|
| Cylindrical polishing machine | 1 | NCB-50 | NOMIZU MACHINE MFG |
| Abrasive fluid processing machine | 1 | EX 1000 | EXTRUDE HONE |
| Electromagnetic barrel device | 1 | TSB-500 | Apro Link |
| PNEUMA-BLASTER/SIRIUS | 3 | FDDQSR-1/SGK-4LD-401 | Fuji Manufacturing |
| Automatic precision cutting machine | 5 | SD5B/HS-25/HS-45A | STC / HEIWA TECHNICA |
| 3Dprinter、3Dscanner | 1 set each | da Vinci Super Handheld 3Dscanner 2.0 | XYZ PRINTING |
| Clean bench(ISO class 1) | 1 | KOACH C 645-F | Koken |
